July 2018
By Allan Nørskov Johansen
Trophy hunting in River Karup. Part 3.
Even though you might lose the seatrout of your dreams, there’s usually something valuable you can take with you from each experience. Especially regarding how you can control and maneuver the big fish in the river (or at least try to), by the use of implementing different rod angles and direction of rod pressure during the fight.
Read more on this subject here in part 3.
Tips and technics for fighting the fish.
Basically speaking, the name of the game is keeping the fish swimming/moving throughout the duration of the fight, thereby ultimately rendering the fish sufficiently fatigued, so that you can land your River Karup trophy… that’s it :-)
I’ve put in countless hours of effort along the river through the years, and as a result have been lucky to experience having contact with some of the river giants. Some I was able to land… others were lost :-)
Each battle with these fish have different nuances of behavior, which find their way into each individual experience. The duration in which the fish find itself in a certain phase of the fight, also varies some.
However, all the trophies I’ve caught, or battled with until I lost them, have all shared a couple of interesting “similar features”, which they play out during the fight. Depicting the fight in “phases”, makes it easier to point out the similarities.
The different phases of the fight.
Phase 1.
How to maneuver the fish out of weed ranks?
Also expect, that the fish will try to bore itself into ranks of weed in the river from the get go of the fight, if given the chance. Either the fish seeks shelter in the weed ranks, while making a run up- or down the river. On other occasions, the fish try to get back to their initial holding spot in the river, after you hook it. If this initial holding spot in fact consist of weed ranks, or if there’s many water plants nearby the holding position, you must try to maneuver the fish away from it!
The easiest way to achieve this is by putting a lot of pressure on the fish from a downstream position, thereby dragging the fish downstream and away from the river vegetation.
If the fish succeeds and bores into the weed ranks, then use the same technic and put high pressure on the fish from a downstream position. Don’t do this when positioned alongside or upstream of the fish… as you’ll only risk dragging it further into the weed rank. “Backing it out” of the weeds, is your only chance :-)
If the hook hold is still intact after the first initial violent jumps and runs, the fight moves to the second phase.
Phase 2.
Don’t freeze!
The exact problem here is, that if you don’t do anything about the “concrete block” on the bottom, then the fish will simply keep its position with ease, not using any energy. Then the angler stands on the bank, pulling on the line from the same direction over a long period of time.
If the hook placement in the fish’s mouth is unfortunate according to the direction of the connection between the fish and the angler, then the hook hold will risk loosening after long time pressure from the same direction. The fish goes free!
Instead, you must aim to get the “concrete block” moving again. So you must be creative, and try to change the angle, intensity and direction of the pressure, you lay upon the fish with your rod. Again, the best advice here is to move to a downstream position of the fish, and then try to change you rod angle pressure from here. This usually gets them moving again... and when the fish moves around, it uses up energy. Which incidentally is your goal at this point in the fight :-)
The fish usually reacts to the change in pressure, by making smaller short distance up- and downstream runs, or maybe it’ll try a couple of lazy jumps, with only half its body out of the water. They simply get annoyed, that you don’t allow it to hold its position on the bottom, where it can “relax” and control the fight from there.
If the hook hold is still good, there’s lots of hope to land your trophy as the fight moves to phase 3 :-)
Phase 3.


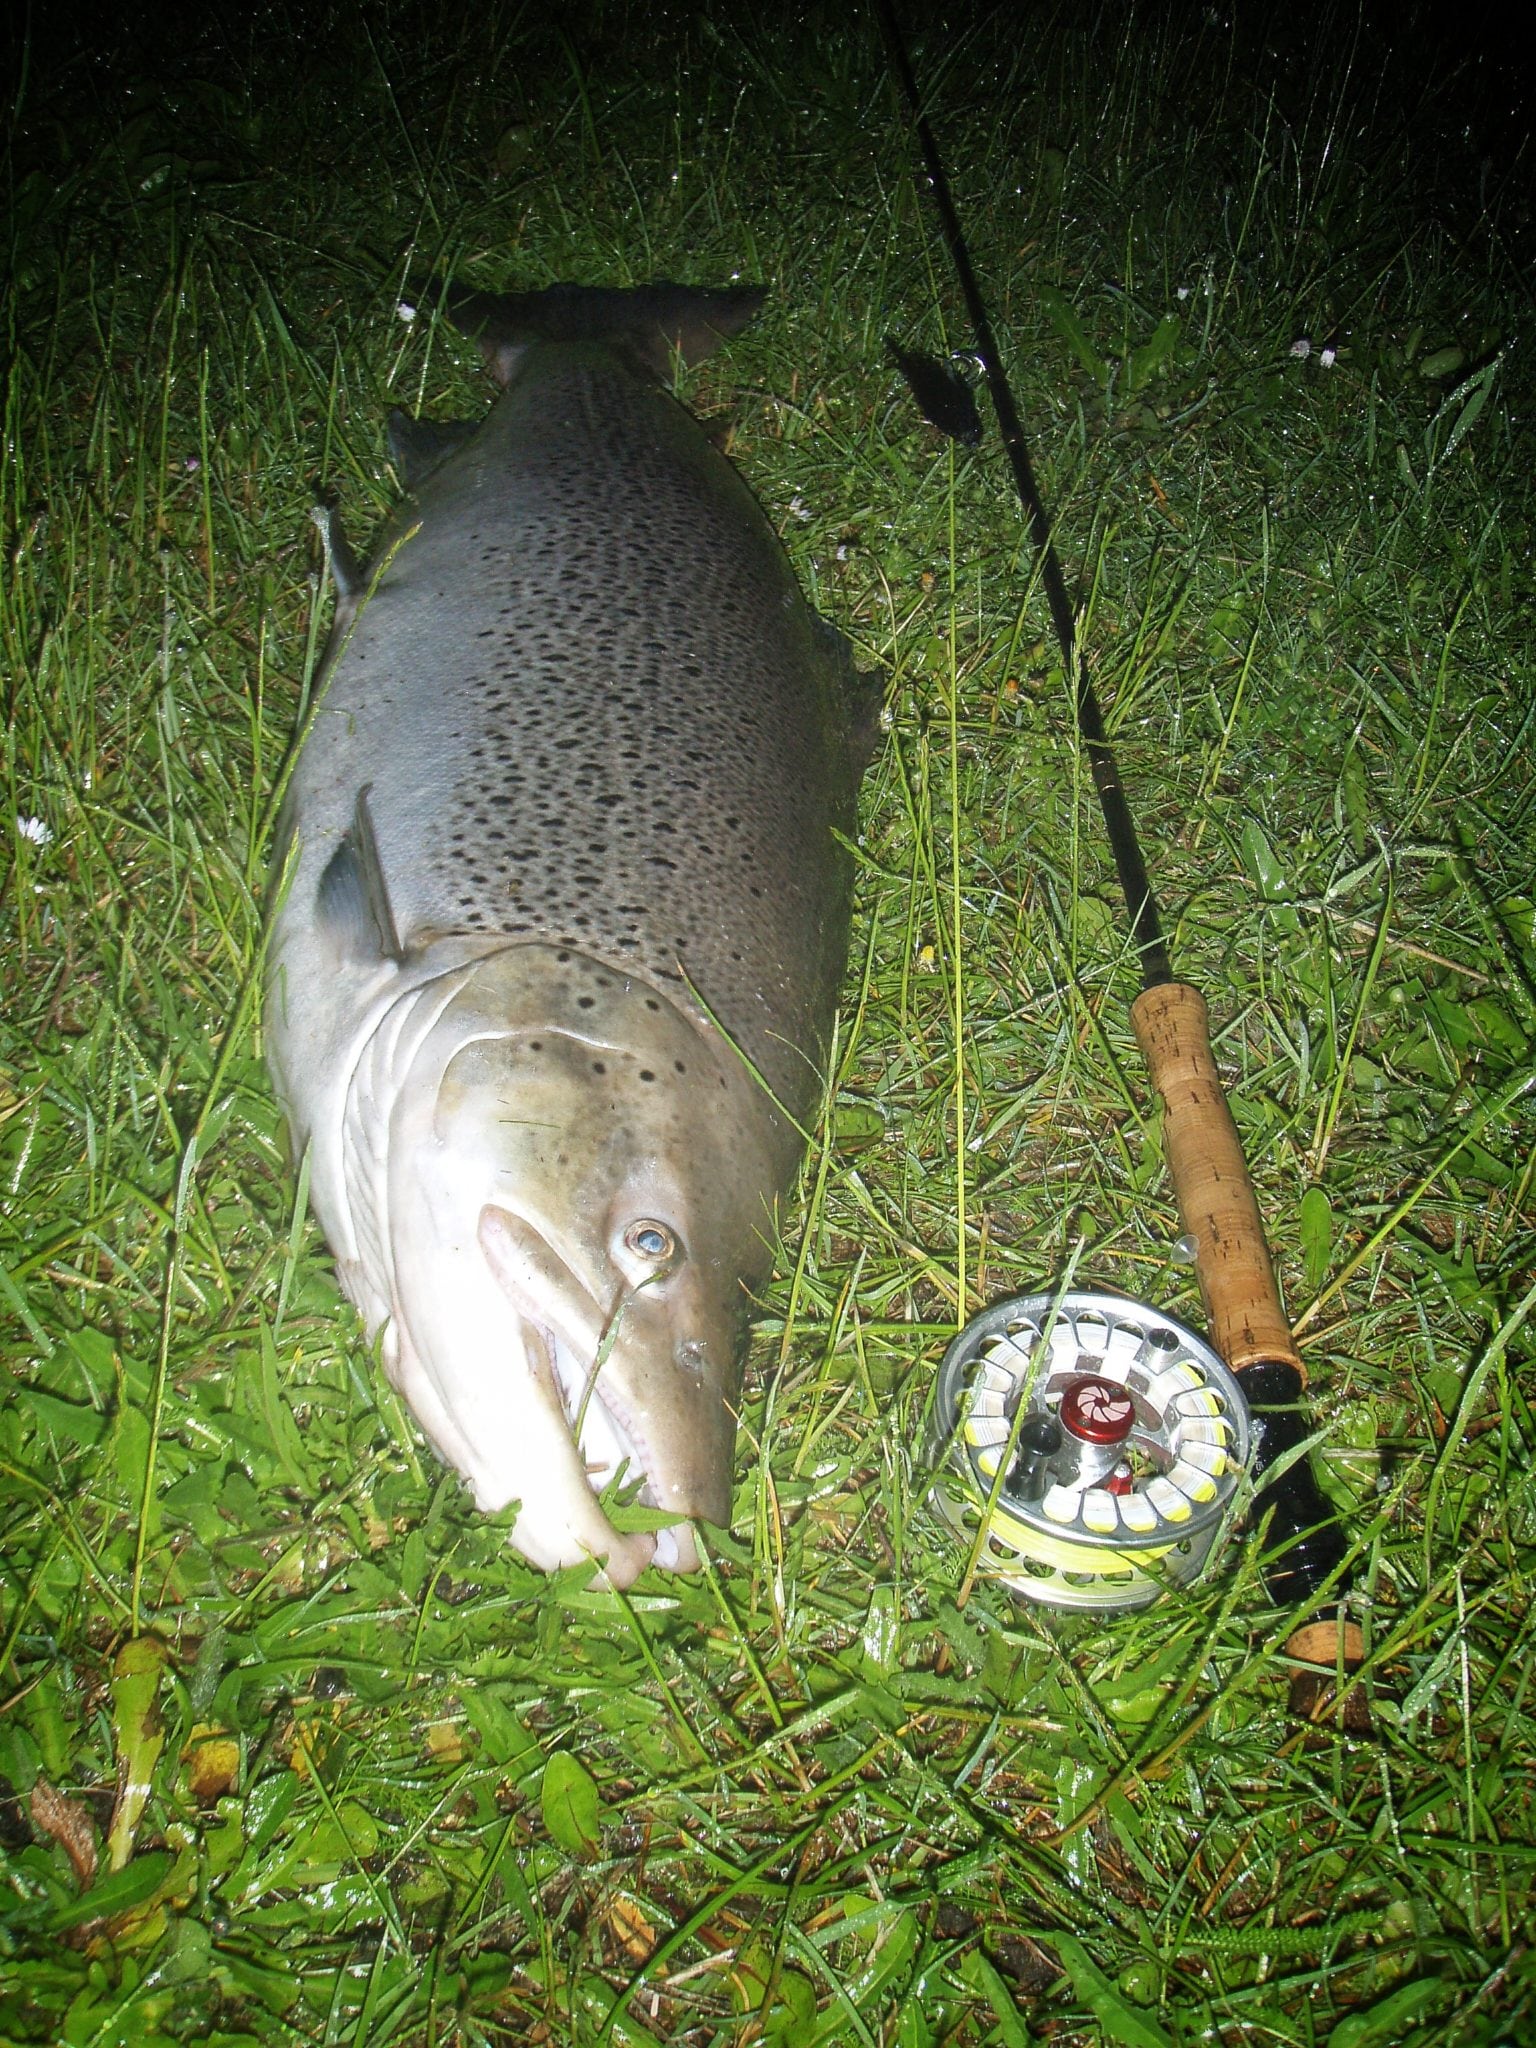


Allan Nørskov Johansen originates from the city of Odense, and he is born 1976. Today Allan resides with his family, close to the river. Allan ”caught” his interest in fishing early on, with brown trout fishing in the small local streams near Odense. Later, many hours along the beautiful coastline of Funen went by, in an ongoing pursuit fly-fishing for the beautiful sea trouts. He visited the River Karup for the first time in the late summer of 1998, and immediately lost his heart to the beautiful countryside, and the river fishing for huge sea trout. Allan prefers a fly rod in pursuit of the beautiful River Karup sea trout, and therefore uses a great deal of time on fly tying as well. The "best experience" by River Karup is often when something unexpectedly and surprising happens on the fishing trip, and the fish suddenly act in a way you did not expect! It creates very memorable experiences. Allan also really enjoys helping others "cracking the code" with fishing tips or flies, so that others may experience catching one of the difficult sea trout from the river. His own best catch from the river is a male fish of 92 cm and 11.0 kg, caught at the end of June 2015. The fish was his second trophy fish from River Karup, surpassing "the magic 10 kg" mark, and gave him a long and memorable fight on his single hand fly rod.